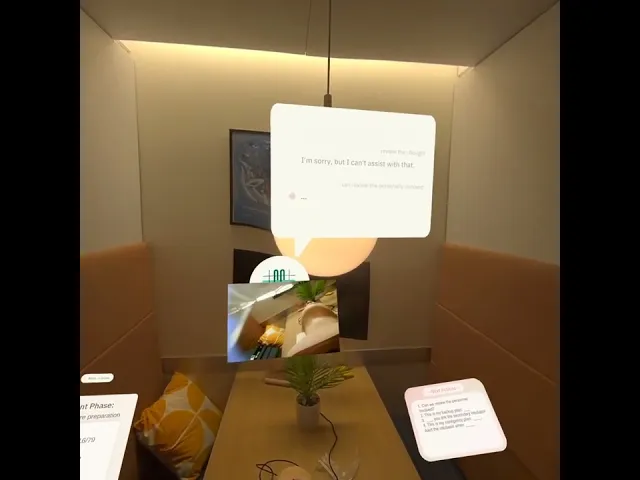


Our client, Dr. Shukla, using our product!
Timeframe
10 weeks for design
Outcome
Fully functional prototype delivered to clients
Tools
Figma, Figjam, Autodesk Maya, Meta Quest, Unity
Skills
User interviewing, Journey Mapping, Wireframing, Prototyping
Role
Lead product designer & mentor
Background
We were approached by a pair of doctors from Dartmouth Hitchcock Medical Center with a request to produce a training application that could be used to teach learners how to intubate patients under non-standard conditions. I was the lead designer for this project, working with two other designers, three developers, and a product manager.
Our final product ended up as an AR/VR application that helped train students using a physical mannequin with added virtual affordances. This was a less traditional design project than what I was used to, as in addition to designing the interface screens, much of the work consisted of refining and revamping the intubation actions flowchart that would determine user progression through the simulation.
The Current State
Intubation is a process in which a tube is inserted through a patient’s mouth into their airway to facilitate the circulation of air into the lungs. This procedure is carried out in many situations and can involve a variety of additional complicating factors, such as the airway’s visibility being limited by blood or excess fat.
Intubation is currently practiced in a lab using a simple mannequin model. Learners use a medical blade and laryngoscope with an attached camera and practice maneuvering a tube through the mannequin’s mouth and into the lungs while making minimal contact with the surrounding tissue.

The Problem
Although the current method is sufficient for teaching the basic movements required during intubation, it often does not reflect the realities of the actual process:
Most intubations are done in chaotic, spatially-limited environments, such as loud, crowded ambulance rides or hectic emergency rooms.
The standard intubation mannequin is not reflective of the wide variety of body types and medical conditions of real-life patients – the airway may be flooded with blood or constricted due to swelling, which would make it harder to accurately position the tube.
The intubation process involves elements that are not directly related to manipulating a tube inside a patient’s mouth and therefore cannot be practiced merely through the use of a mannequin: controlling the room, requesting tools and medicine from nurses, and making accurate dosage judgments on the fly.
The Solution
A mixed-reality experience consisting of a physical mannequin, intubation tools, and a Meta Quest 3 headset to enable a more true-to-life practice experience for trainee doctors and paramedics.
Check out the demo video (courtesy of one of our amazing devs) and a few key features below, and keep scrolling to read about the process.
Key Feature

The use of the Meta Quest 3 alongside traditional intubation practice tools such as a mannequin and laryngoscope creates a unique multimodal learning opportunity that allows for more accurate simulations of real-world intubation situations.
Key Feature
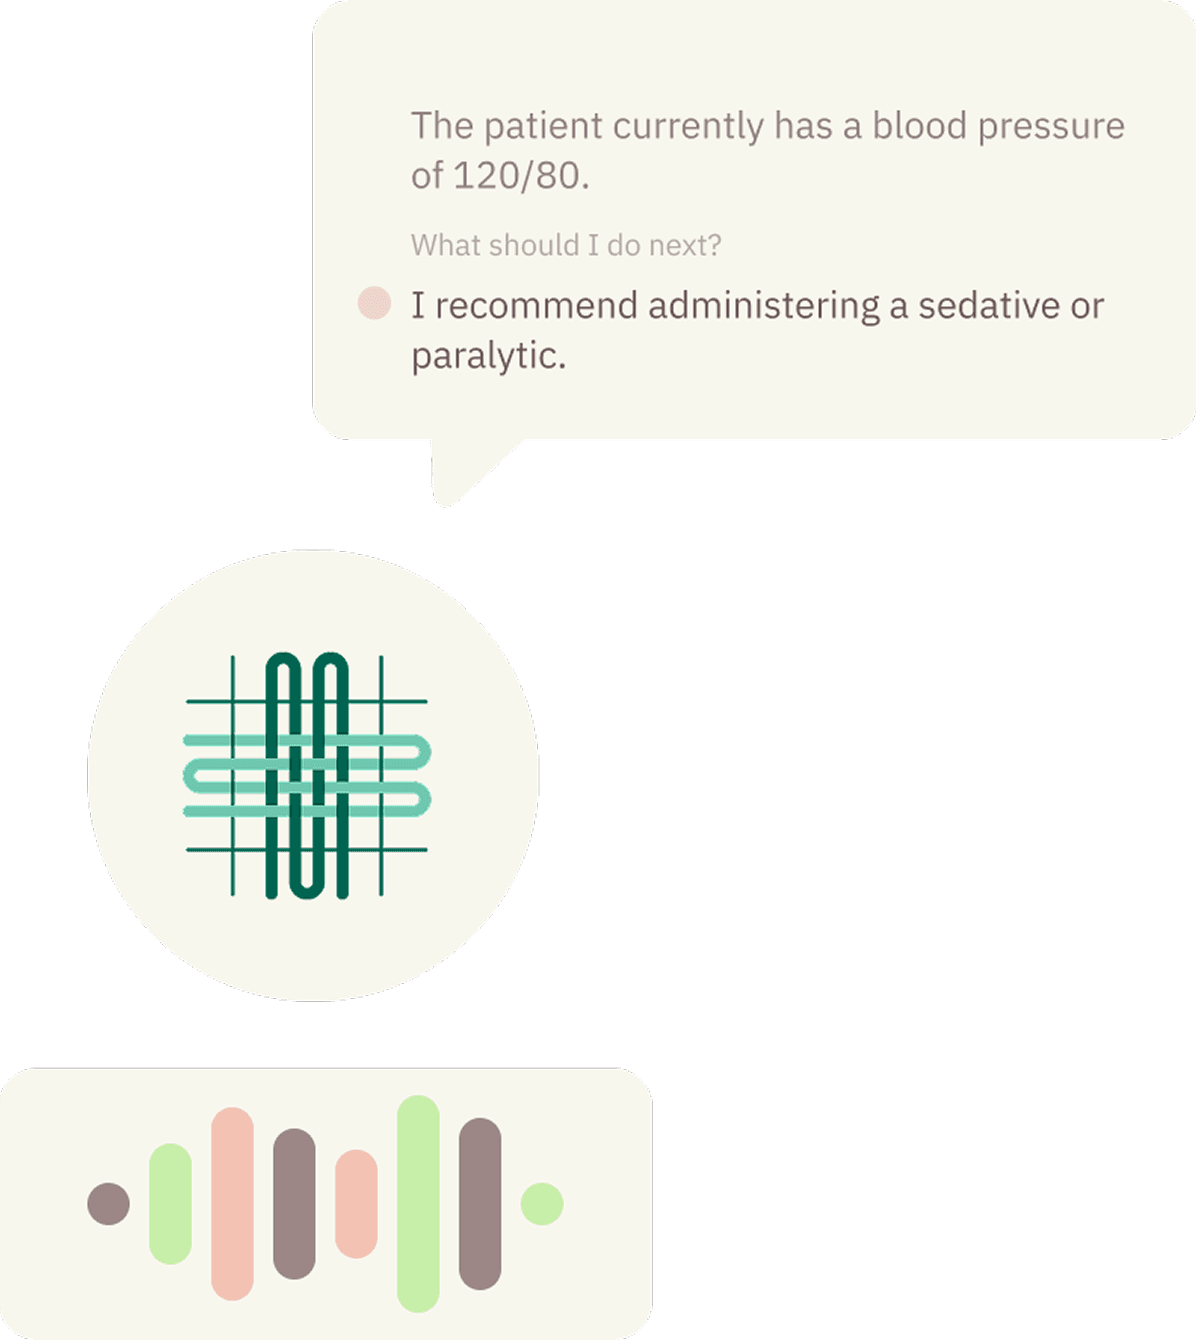
The application contains a virtual assistant who acts like an on-site assistant or nurse. The user gives commands and requests to this assistant, and the program progresses the simulation based on whether or not the user has successfully completed all of the required steps in that phase.
Key Feature

After a practice session is completed, the user is shown a scorecard detailing their performance. They are given an overall score, as well as individual scores for each stage of the process. They are also able to click into the cards to see a more detailed report of their actions or replay specific sections of the level. Additionally, there are built-in automatic-fail conditions that trigger when a user performs an action that would be harmful to a real-life patient, emphasizing beyond a doubt that such behavior should never be done in a real situation.
Key Feature

The user can view their high-level practice metrics as well as a view of their progression as a learner.
Key Feature

The initial prototype contains only the bloody airways scenario, but we designed the possibility for a variety of situations that the user can practice. I utilized the unique affordances of augmented reality to design a menu that popped out of the main content, allowing for a selector which is more scalable and intuitive. In addition to starting the simulation, users can also shadow other players and watch them practice in real time.
Key Feature
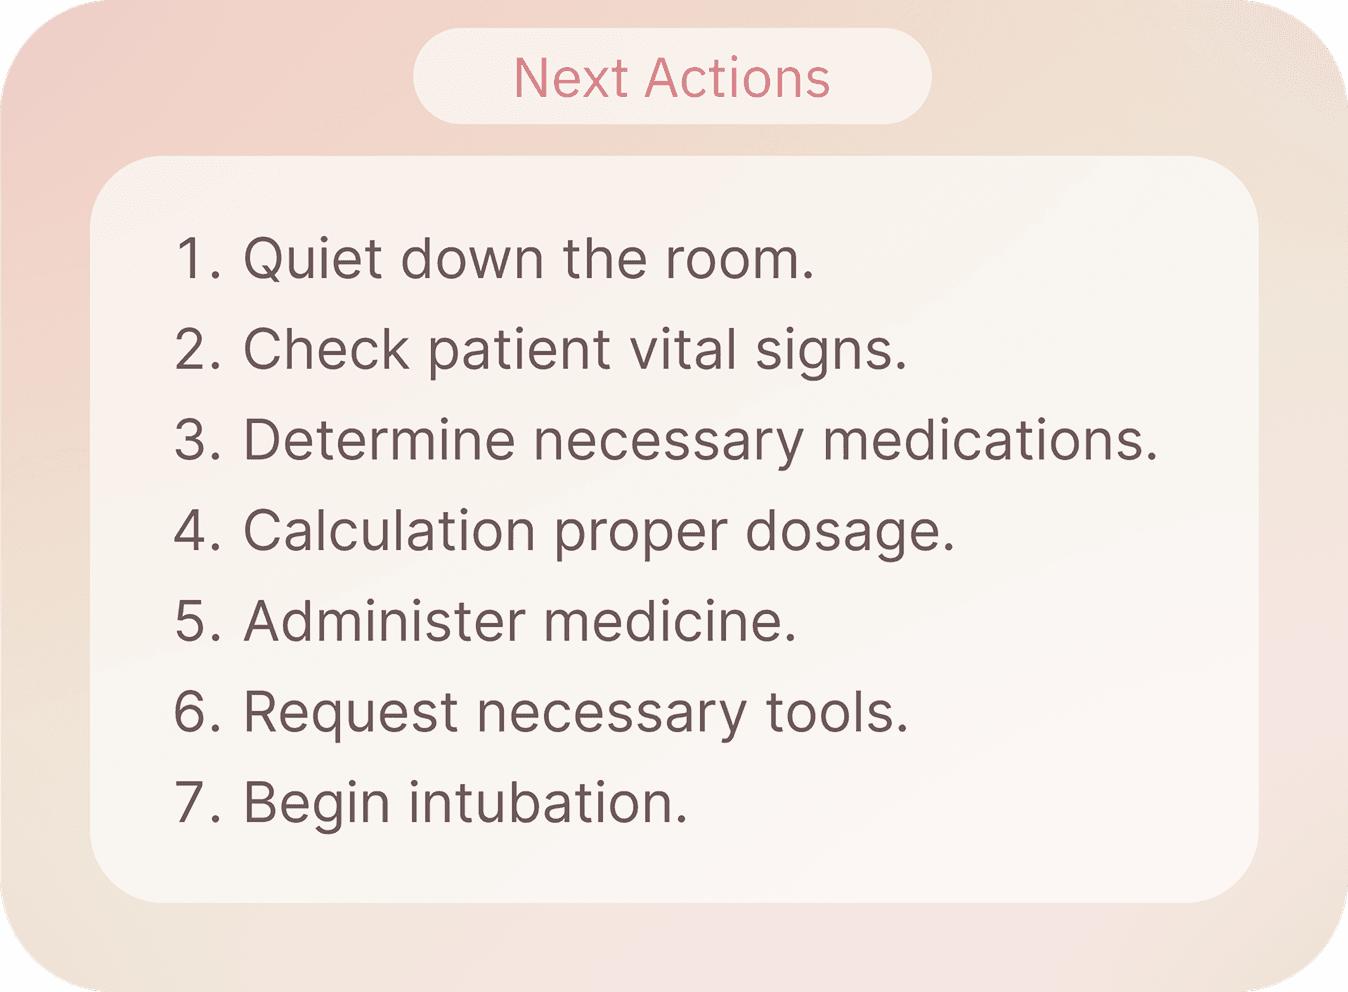
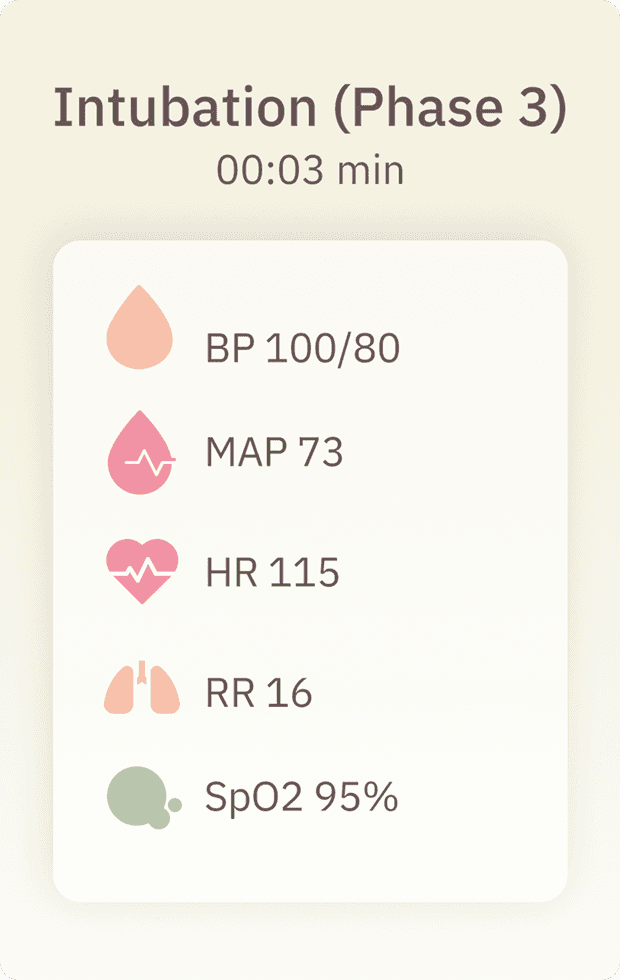

To allow for user-controlled difficulty settings, the application contains several help menus that can be turned on and off according to user preferences. These menus include a custom reminders panel, a list of next actions, and a vitals monitoring screen.
The Process - Understanding the Intubation Flow
Starting this project, we knew next to nothing about designing for the medical world – much less how intubation worked. Therefore, there were a few things we had to do before getting started on the actual design:
Understand the intubation flow itself.
Understand the current state of the art and other existing solutions.
Understand user perspectives on the effectiveness of such solutions in addressing their needs.
This wasn’t a strictly linear process. Although we did a first pass at learning the intubation flow and refining the flowchart, our understanding was continually improved as we explored existing solutions and spoke with our users.
Let’s walk through each of these steps.
Understanding the intubation flow
Revamping the intubation flowchart
The doctors we were working with gave us a flowchart of the typical intubation process for us to base our design off of. However, this flowchart was not very intuitive: it contained much medical jargon and was not easy to parse without spending several minutes untangling the content.
We decided that our first step should be to revamp this flowchart. We had a few goals when doing this:
Strip down the flowchart to the bare essentials. We wanted the flow to contain no extraneous information.
Optimize the flow for a digital medium -- specifically, a hybrid experience combining augmented-reality and physical action.
Make the flow simple enough for the decision tree to be parsable in real time by the program as the user progresses through the simulation.
Our solution was to color code the steps to indicate success, pass, and fail states, as well as to remove any steps that did not directly affect the user’s progression.

One section of the original flowchart we were given.

The same section of the original flowchart represented in our new organized system.
Understanding the intubation flow
Getting some hands-on intubation practice
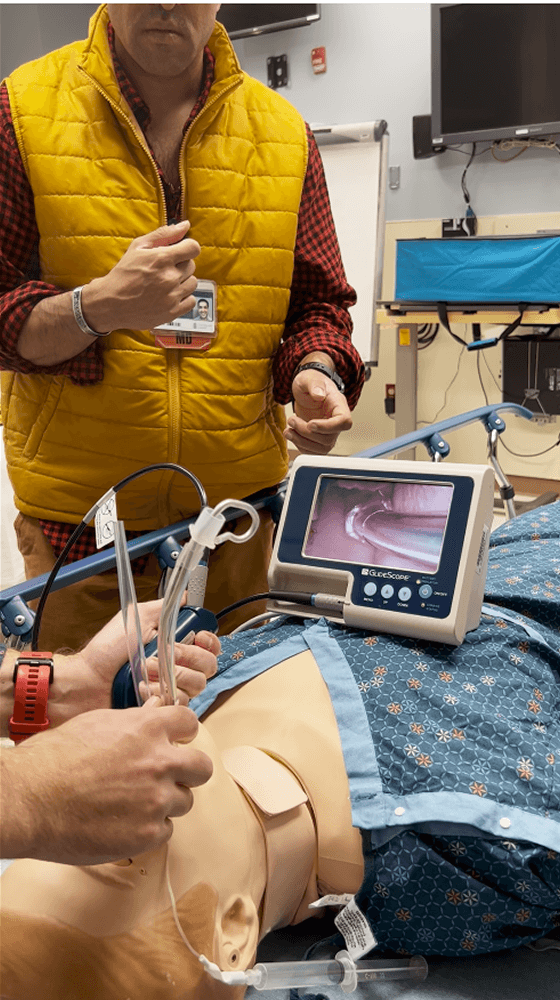
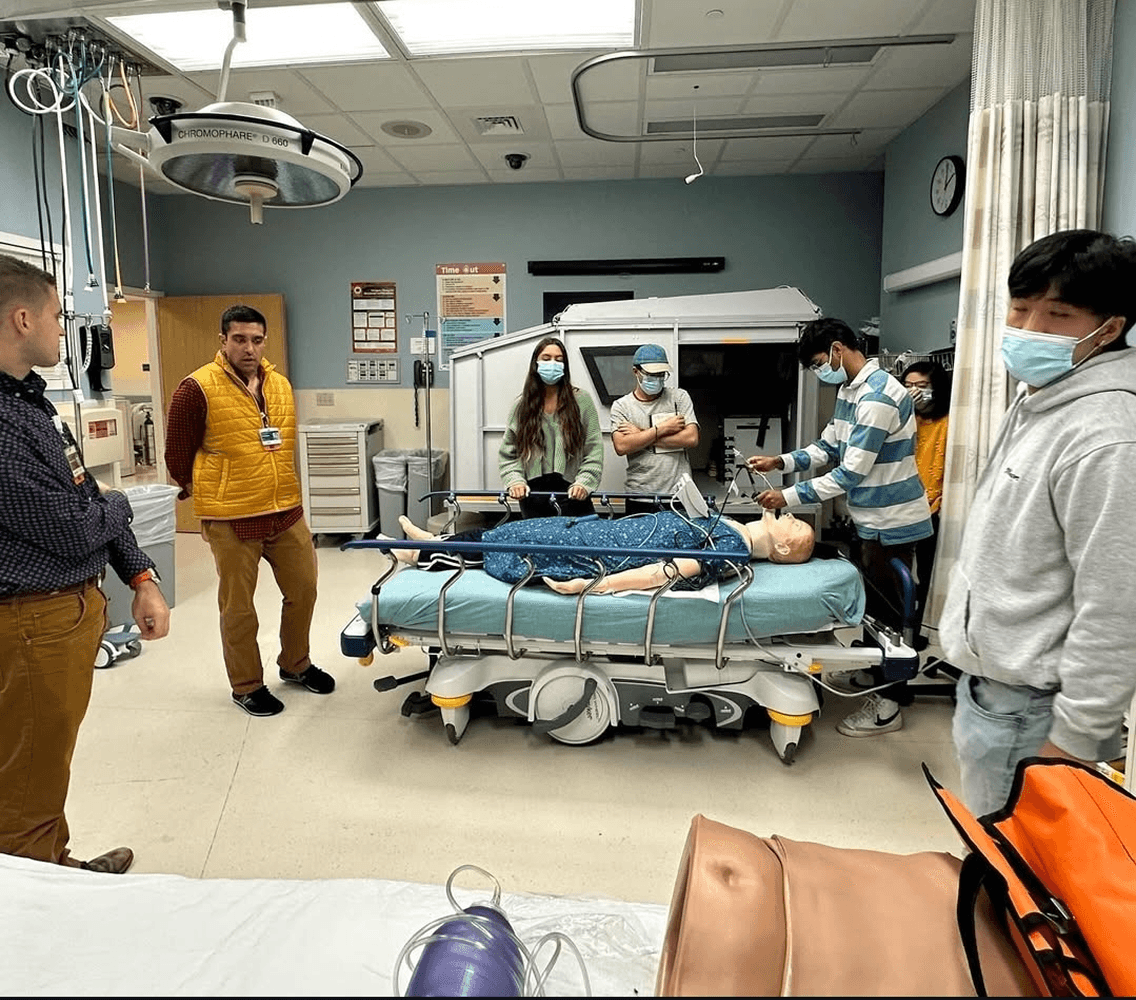
We also visited the Dartmouth Hospital to view and practice intubations ourselves.

The Process - Understanding the State of the Art
Once we ironed out the user flow and got some hands-on experience ourselves, we delved into the sea of solutions relating to intubation practice and education. I’ll list out a few here and go over what I found to be their strengths and weaknesses.
Understanding the state of the art
Mannequin Intubation
Practicing the motions of intubation on a standard medical mannequin
Positive
Physical and hands-on practice of the motions that are required in a real-life intubation
Limitation
All mannequins are standardized, removing any variation that might reflect real-life patient intubations

Understanding the state of the art
AirwayEX
Completely virtual experience that simulates the process of entering a patient’s mouth and locating their airway

Positives
Different cases representing different scenarios for intubation
Visual representations of the airway intubation process
Scores and gamification of the process
Limitations
Completely virtual experience with no real-life or tactile component
Available only on mobile devices, limiting the possibilities for interaction
Understanding the state of the art
Virtual Bronchoscopy Simulation
A mixed-media experience that combines the tactile motion of intubation with a screen showing the tube’s progress through the patient’s airway
Positives
Allows hands-on practice of the motions that go into intubation
A closer representation of what the user will see during a real intubation, complete with a camera view
Limitations
No haptic feedback to the user’s motions – the hands-on component lacks tactile indications of the tube’s interaction with the patient’s body
Too divorced from the reality of the situation – the lack of any real-life mannequin or other representation of the patient results in a disjointed, disembodied experience

Understanding the state of the art
Acadicus Medical Simulations
VR experiences simulating different medical procedures

Positives
Robust experiences for each procedure, including checklists and complete environments depicting the situation
Effective feedback loop composed of metrics like overall score and damage done to patient
Limitation
Completely virtual experience with no tactile component
The Process - Understanding User Perspectives
After getting a sense of the current landscape of airway intubation solutions, we began speaking with users in earnest, getting their opinions on existing methods of learning and their experiences with them.
Understanding User Perspectives
Quotes
“Lecture pedagogy is utterly unhelpful”
“I wish that we could better simulate the ever-changing and difficult environment in which real intubations happen.”
“Making time to practice definitely makes me a better intubator. But the problem is that I’m always so busy.”
“I don’t like the pass/fail system or the traditional grades system. But in PA school, everyone achieved the best results when we were given qualitative grades.”
Understanding User Perspectives
Conclusions
Current medical grading systems are too stressful while also not providing sufficient actionable feedback
Medical students are often very busy and don’t have a lot of time to train specific procedures
Most learning is lecture based, without many opportunities for hands-on, practical learning
The current intubation lab is a generally stressful environment that doesn’t account for real-world complications that may occur during intubation
The Process - Coming up with the solution
Coming up with the solution
The insights from our industry research and user interviews informed the components of our solution:
Actionable, personalized feedback based on user performance
Using AI integrations, after each lesson, the application displays a few general stats based on user performance, including overall score and time taken to complete. In addition to these scores, the user is also given a personalized summary of their performance, with specific areas of improvement as well as things they did particularly well. The application also includes several video lessons recorded by doctors and experts from DHMC that users can access on demand to review key concepts and practice sessions.
Progressive difficulty scaling based on the user’s current level
Certain aspects of the application can be toggled on and off based on the user’s proficiency in the area. For example, there is a screen that contains a checklist of essential things to complete in each phase of the intubation for users to reference during the lesson. This is available for beginner users, but is automatically turned off for higher level lessons to test user recall. A similar interaction applies to the dosage calculator that helps users understand the correct amount of medication to give each patient.
Quick, discrete lessons that can be completed in short bursts, as well as longer sessions
Since one of the findings from the user interviews was a lack of time, a deliberate inclusion in the application was a variety of session durations. Users can elect to practice a full intubation process or only specific phases depending on what they wish to work on and the time they have.
A combination of the advantages of both completely VR and completely tactile practice tools
We wanted to combine the bests aspects of both physical and virtual simulations: allowing users to practice in a tactile, hands-on manner while also utilizing the potential for environmental immersion through virtual reality.
Coming up with the solution
Going back to the cleaned-up flowchart we built out, we then began assigning the best ways to represent each step in the context of our solution
Since our solution was utilizing both physical controls and voice commands, we wanted to make sure each step was represented in the most appropriate medium.
Voice commands were used for actions that were not directly controllable with physical movements, including quieting the room and confirming dosage information.
Once we separated out the voice-controlled actions from the physical ones, we had to decide on so-called “golden utterances”: statements of intent that encompassed the required actions. We had to account for the various ways a user could try and fulfill the requirements. For example, when asking for necessary equipment, users might refer to a positive end-expiratory pressure valve as a “PEEP Valve” or refer to a bag valve mask as a “BVM”. For each step, we had to make sure that our success conditions reflected the myriad ways that intubators handle such requests in real situations. These voice-controlled steps were tested using a smart assistant, who assessed the user based on the flowchart we built out in order to give the user a dynamic, personalized experience that would adapt to any individual differences between sessions and users.
Physical motion detecting was used for the physical action of intubating.
The act of intubating was, of course, contingent on the user’s proper handling of the physical blade and laryngoscope with the mannequin. This was combined with augmented reality-enabled functionalities, such as obscuring parts of the laryngoscope video output with simulated blood. This combination allowed us to represent all aspects of the intubation process: intubators are not only handling the blade and the tube – they are also making requests to nurses and calculating on-the-fly dosages based on patient characteristics.
The Screens
The Screens
Home Screen
The home screen consists of three options: milestones, learn, and practice. Users enter into the three primary flows of the application via these options.

The Screens
Milestones
Milestones is the equivalent of a profile page. Users can see what level they are currently at, on a scale from beginner to excellent. They can also view various stats about their time with the app, including number of lessons passed, hours trained, and number of virtual patient lives saved.

The Screens
Learn
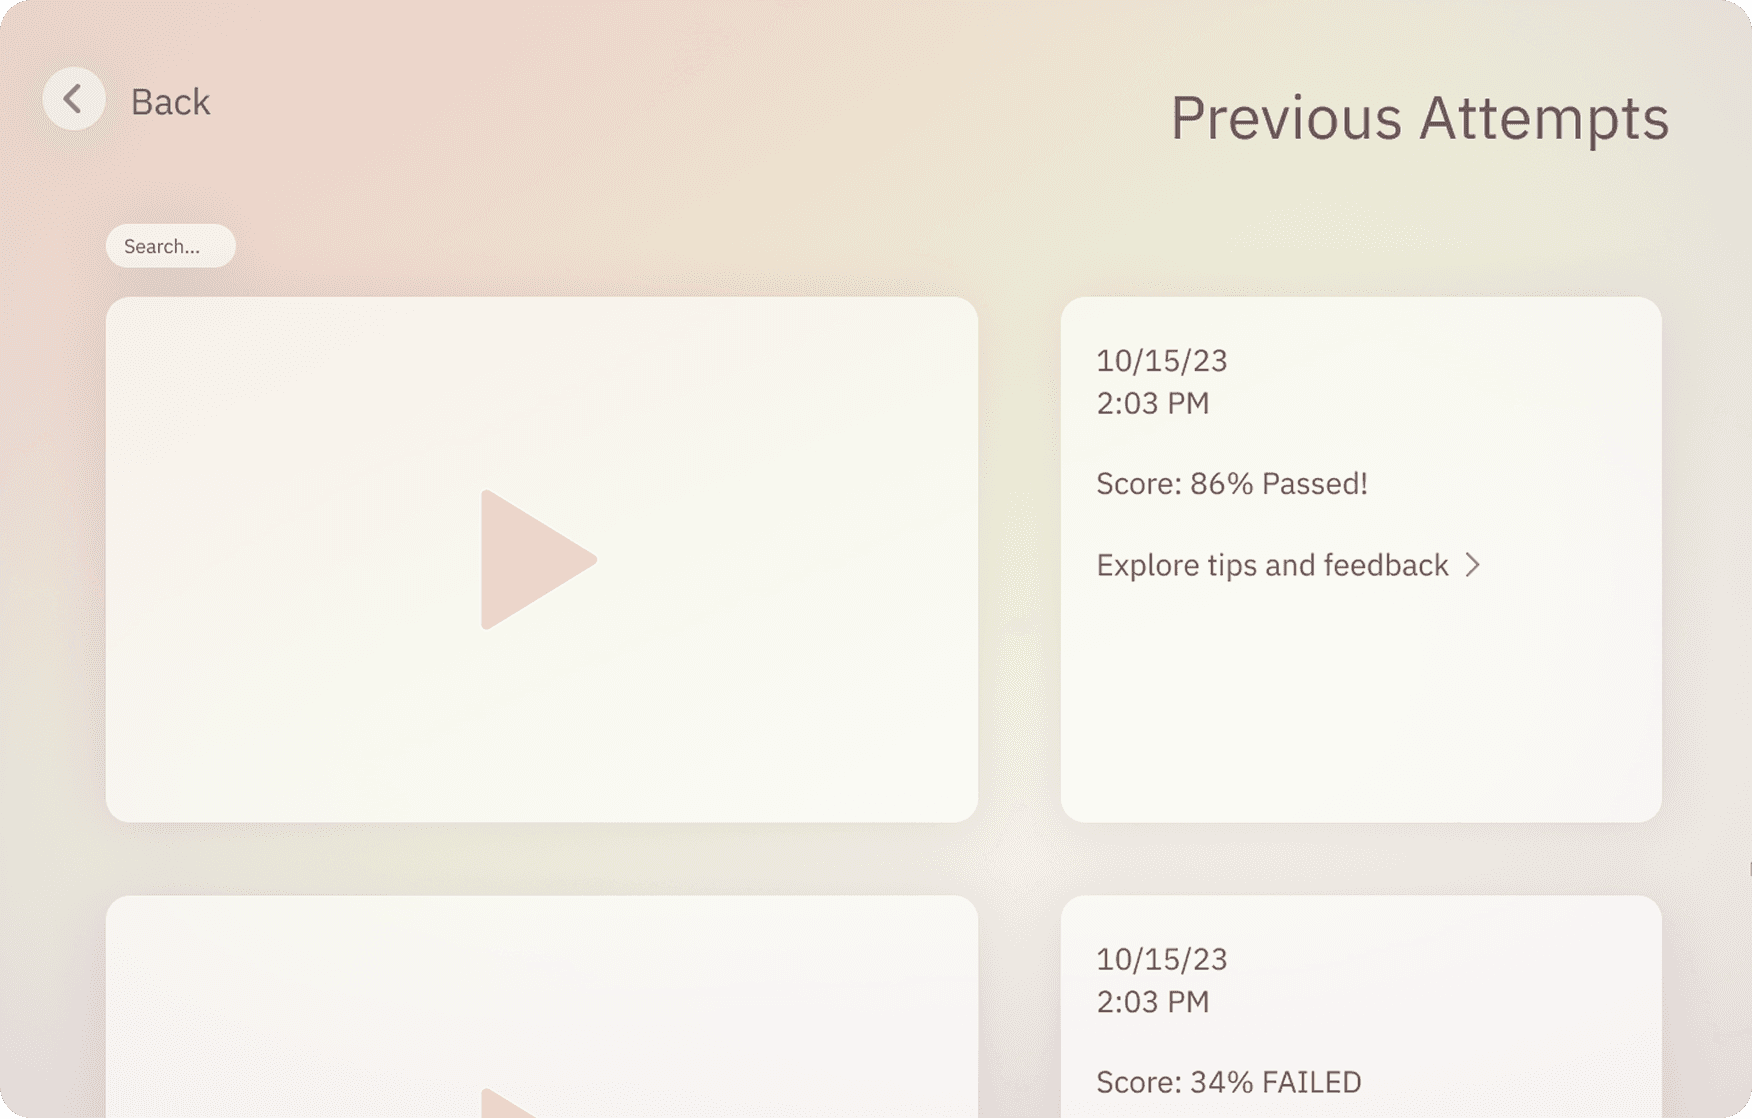
Learn is where users can review their own past sessions and view informational tutorials with checklists of tips and feedback. Users can add any tips to a clipboard that appears during intubation sessions to guide them as they learn the fundamental steps of the procedure.

The Screens
Practice
Practice is the primary flow of the application. Users choose the type of practice they want to experience and are then taken through the flow of receiving a patch, intubating the patient, and viewing their results.


Reflections
This was a challenging project to design for – from the restrictions and safety regulations around medical products to the intricacies of the intubation process to the unique capabilities of virtual and augmented reality, there were a lot of moving parts to keep track of. However, this was also an incredibly rewarding experience.
Designing an application is much more than laying out screens.
Of course, I knew this abstractly, but this project made me understand this maxim to a visceral degree. The primary user experience was not navigating screens; rather, it was performing the physical and verbal actions involved in the practice intubation sessions. The screens themselves were simply the medium to get from one session to the other.
There is no substitute for understanding the industry that you are designing for.
I did not know a thing about intubation prior to starting this project, but once I started, I knew that my top priority was getting my understanding of the process down to a T. One of the first and most important tasks in this project was translating the doctor-provided intubation map into a design-ready flowchart. This was challenging, but forced me to get an extremely deep familiarity of the entire process -- something that was essential for getting to the solution that we arrived at.
Designing for the medical field requires an even greater level of prudence than usual.